VINTAGE WRAP SHIRT
There were so many gorgeous pieces of clothing in the 60’s and 70’s that had gone out of style over the years. Fashion is turning around and looking towards our past now, reliving days gone by and pulling out those old vests and vintage clothes.
Here’s a piece recreated from a vintage magazine, of a classic wrap shirt. The shirt is very simple. It’s basically a rectangle with a hole for your head, and a long tie to hold it together and add a bit of style. Perfect to wear with your high-waisted skirts or anything that would look even more fab with a bow.
Materials:
Measuring tape
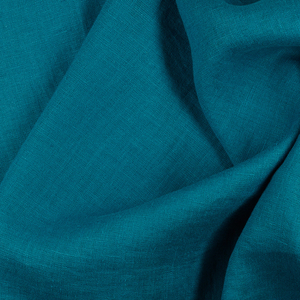
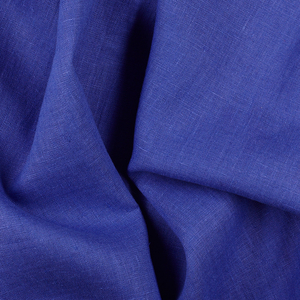
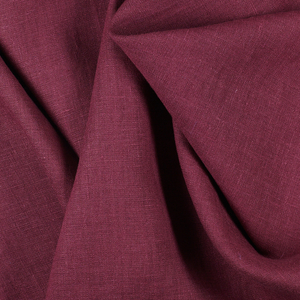
IL019 Fog Green (1 yard)
Thread
Iron
Measure where on your shoulders you would like the shirt to end, and make sure that measurement is wider than your bust in the front (larger busted women – you may need to make the front panel wider than the back panel).
I’ve decided to have the shirt fall about 1/3 down my arms. The width is 28″.
Measure from where in the front you want the shirt to sit, over your shoulder, and down your back to where you want the shirt to end. Mine is 18″ for the front and back, for a total of 36″ in length.
Those two measurements are what size to cut your rectangle for your shirt. In the very center, cut out an oval and a slit for your head to fit through, in whatever design you’d like for your shirt.
Now cut out two thin, long strips about 1″ wide. ‘ You’ll want to fold, press, and straight stitch one end of these strips, and the turn them out in a tube.’ Like so:
These ties are going to attach to the front of your shirt, to tie behind your back and keep the shirt closed in the front.
Iron the two long, selvage edges of your rectangle in at the seam allowance. Fold over and iron ‘¼” once, then twice. Before top stitching, pin your two small straps at the front.
I pinned mine in about 2″ above the front selvage edge. Stitch across the strap to secure it in place.
Then tuck it into the side hem and top stitch across the side.
I also stitched at the edge of the seam to secure it.
Don’t forget to hem the front edge of your shirt!
Next, cut a very long strip of fabric that is 3″ wide, or however wide you want the tie that wraps around the back and ties in the front to be. You’ll need to cut two of them out, at about ~80″ in length. If you need to seam them to make them longer, make sure to iron the seam open. Don’t sew these two ties together into a tube yet.’ Find the center of the tie, and the center of the back of the shirt. Match these two points together, and the pin the shirt and tie right sides together. Pin the second tie to the first, sandwiching the shirt between the two layers of the tie. Stitch along the seam allowance on the tie.
There’s two easy ways you can do this next step.
The first way is to carefully push the shirt into the tie material, pin and stitch all the way around, leaving a small 2″ area in the tie’s seam to turn it right side out.
The second way is to stitch the tie’s seam allowance, leaving it open where the shirt is. Turn it right side out and iron the seam allowance under, then top stitch around the edge of the tie.
There are actually a few other ways to attach the shirt to the tie, but I’ve found that these two ways produce the nicest results. Use what works best for you!’
Whatever method you use, make sure you top stitch the tie for a nice clean look.
To finish off the neck, you can use a rolled hem, use interfacing, or trace the neck hole onto paper and create a lining.
I decided to do a combination of the three. I made a lining for the slice in the neckline, by cutting a piece of fabric that was 1″ + length of the slice in length and 2″ wide. I laid this on top of the neckline, matching the top selvage edge, then pinned and sewed with a ‘¼” seam allowance.
Cut the fabric down the slice, clip the curve at the bottom, and turn and press your fabric.
Before top stitching, it’s time to do the rolled hem on the neckline!
Open the slice’s lining back up and press the seam open at the top edges. Fold the neckline down ‘¼”. At this point, you can either stitch it, or fold it another ‘¼” and iron it, then top stitch around the neckline.
Fold in the slice’s lining and top stitch.
Your beautiful vintage shirt is complete! Add a flower pin, hammer in some grommets and add some ribbon, paint a design across the front – the possibilities are endless and will certainly be a unique addition to your closet.
If you liked this tutorial, be sure to let us know in the comments below and show off your amazing “œvintage” wrap shirts!










4 Comments
Alex NG
So I just made this top on muslin and wanted to point out several things being a completely newbie to sewing.
The pattern mentions that you only need 1 yard to complete it, however, the ribbons are more than one yard. If your fabric width is not 80in” as mentioned in the pattern, you would have to buy more than one yard.
The instructions were confusing to follow especially that there is a lack of pictures and the pictures shown does not show the full picture of the piece being made. For example, making the ties, the tutorial mentions that there are several ways, but shows only two ways that are in my opinion described quite vaguely, one of the reasons why I decided to cut on muslin first instead of my nice fabric… Furthermore, I felt that there was a lack of description on where exactly where to place each 4 ties (1in” and the 3in” one), However, a bit of patience and those misunderstandings can be easily solved. It might also just be the fact that I’m still new to sewing and not used to following those kind of instructions.
I am still very grateful to fabric store for providing those tutorials for free.
Cheers,
Robyn Alice long
Hi there I would love to recreate this top you made it sew beautifully ! I don’t understand the instructions and cant follow the pictures that well. Would you be able to rewrite them for a begginer to follow?
Very beautifull !
Thankyou
Tzofiya
I have to say i love linen & the color choice! How lovely! The pictures are very clear. I would buy the fabric & do this in a heartbeat, except i am new to sewing clothes. And i was wondering, is there a video, that shows close ups & far away shoots for newbies. I would take this to at friend who sews clothes , but i don’t know anybody. Yet. And yes i am addicted to linen but its cheaper then theraphy. I’m a quilter, thats what i use fabric for. Please make video for people like me?
Thank you!
T
Masha
Tzofiya, so sorry for such long reply! This is a great idea and we are sure to take this into consideration and work towards video medium. Our current tutorial is super easy- have you seen? The firecracker fringe scarf. Also- are you on facebook? We have a page which boasts with quite a few really talented seamstresses. As an idea, you could post and see if anyone would be interested in making this for you? this is the page: https://www.facebook.com/pages/fabrics-storecom/439149005345?fref=ts
Let me know if you have any luck.
Masha.