DIY: Bordered Table Linen
The border on this tablecloth is a simple detail that will transform your table into something special. You can make your table linen vibrant and colorful, or go for more classic and neutral shades. With this easy-to-follow tutorial you can turn your next meal into a true dining experience. Try out this fun and simple home decor project!
Materials:
- Two different shades of linen.
- Measuring tape and/or ruler.
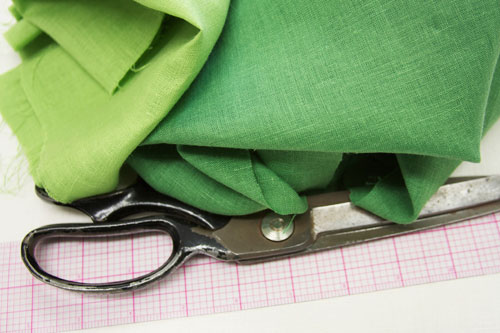
- Scissors
- Sewing machine
You can select whatever shades of linen you like for your own tablecloth. In order to get ready for Spring, I picked out a couple fresh, green shades. This will be perfect when St. Patrick’s Day comes around too! I choose to make mine with lightweight IL020 linen in Flourite Green and Vibrant Green.
Take a look at all the color options for IL020 here >> Colors.
So how much fabric do you need to cut exactly to make a tablecloth? Well, I found this really handy tablecloth calculator online that makes figuring out measurements for your table a piece of cake. You just need to measure you table and plug it into their calculator. It couldn’t be easier!
Once you get the measurements for your tablecloth you can start considering your border. I wanted a 3 inch border for my tablecloth, so I cut a 4 inch wide border.
I made a rectangular tablecloth, so I cut four pieces of linen for the border. Two of these pieces correspond to the length of my tablecloth and two go with the width.
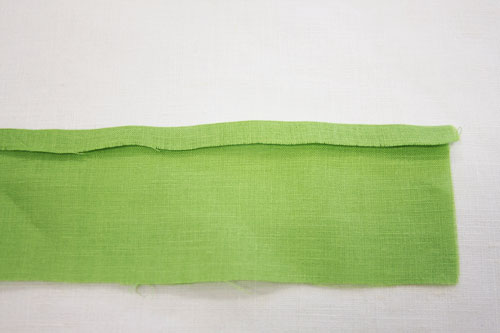
Fold the one edge down a 1/4- 1/2 on all of your pieces for the border.
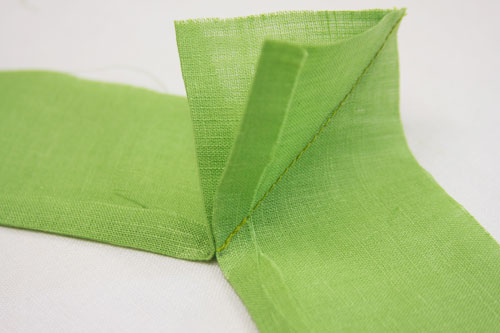
Measure the width of your folded border to get an exact measurement. I will explain the next step so that it relates to the image above. What I did next was measure this same distance from the top left corner going inwards (to the right) along the folded edge.
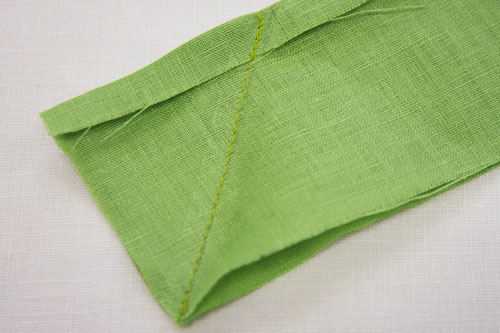
Now make a mark with some chalk or a pencil. Draw a line from the point you marked to the bottom left corner.
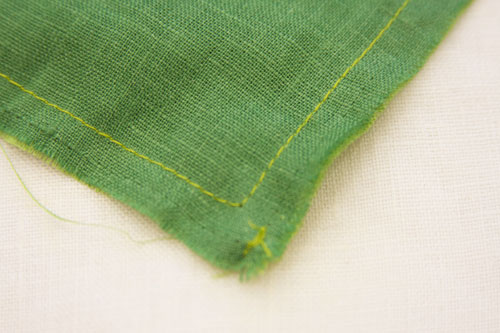
The image above shows the seam you make over the line you marked. Sew carefully! This will be the corner and your tablecloth, so you won’t want any crooked lines showing.
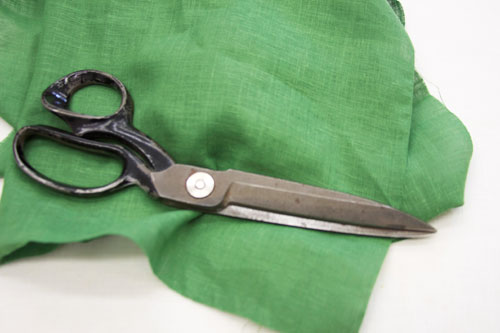
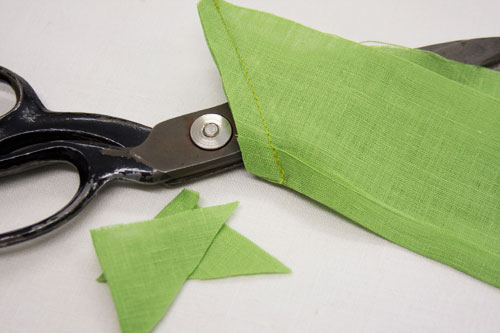
Repeat this step with the remaining four corners. Make sure you sew the right pieces together and have them facing the right direction. I had to redo my stitches a few times because I wasn’t paying attention. It’s a pain but at least it’s still fixable at this point. After the next step, you won’t be able to simply remove stitches if you make a mistake. It’s time to grab the scissors!
Trim off those edges and leave a 1/4 inch of linen.
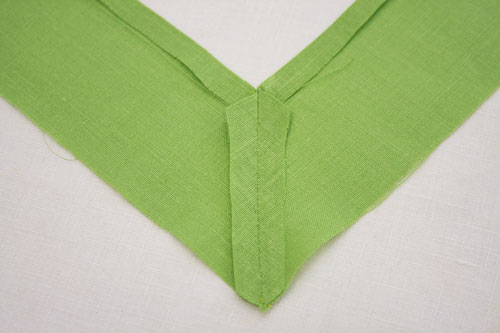
When you finish trimming the extra fabric from the corners and iron everything flat.
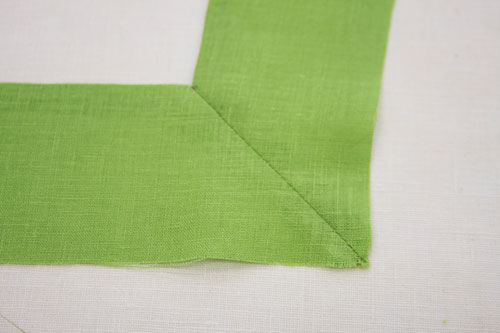
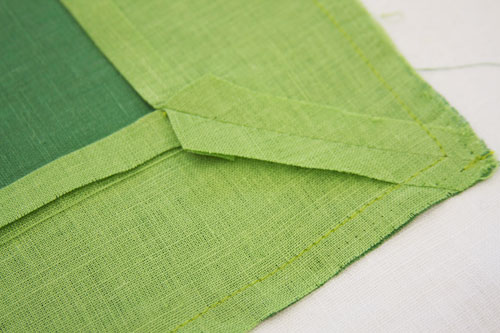
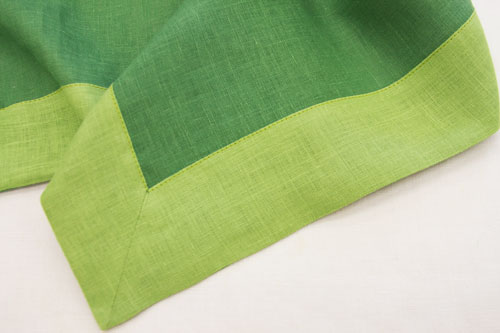
Make a seam along the entire edge to attach the border to the rest of the tablecloth.
This is what the seam and attached border looks like from the other side. We are finished yet though! There is still one more seam to make.
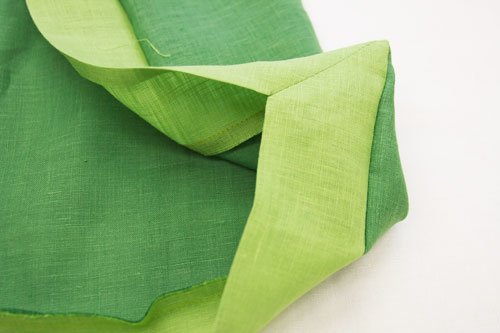
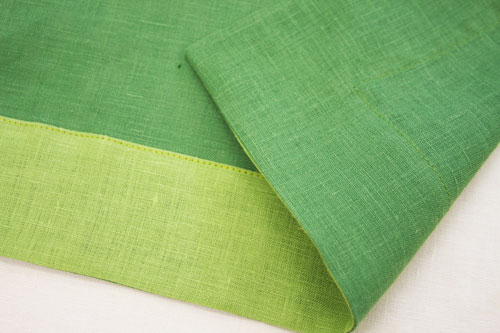
Now just fold the other edge of the border in a 1/4 -1/2 inch in and make a seam around the entire border.
A good thing to keep in mind before you start sewing this step, is to make the under-stitch match your table linen color and not the border. Just switch out the thread color for the under-stitch on your sewing machine. Leave the same color thread as the border for the part of the stitch that will be visible from above.
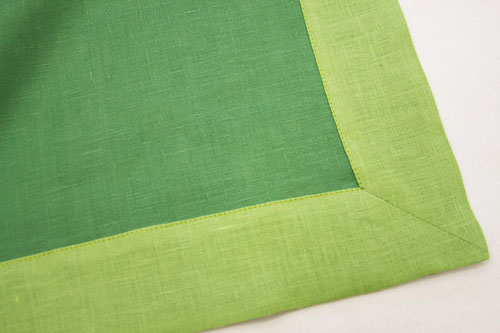
See how the darker green stitch is barely visible because I changed the thread for the underside?
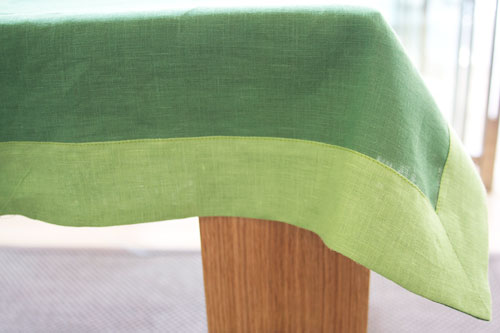
This completes the border and the tablecloth!
Just iron your beautiful table linen and place it on your table. You are all set for the next meal around your table.
*I choose to do sew my bordered tablecloth with two different shades of green. A good choice for the Spring and even St. Patrick’s Day! There are an endless amount of color combinations you can pick for your table linen. Select your favorite combination here >>> Shop colors.
Remember, I used IL020 for my tablecloth, but IL019 and 4c22 work perfectly too. It just depends how thick/heavy you want the linen to be. Il020 is really light and sheer, IL019 is right in the middle, and 4C22 is heavier.
"Like" us on Facebook if you enjoyed this tutorial or just want to stop by our page!









21 Comments
Hallie
Great tutorial! Any tips or tricks for pressing perfect 1/4″ seams? The seam gauge seems helpful but do you use something to help hold it in place while ironing?
Toni
Am I crazy. I don’t understand how you can measure the border fabric the same length and width as the tablecloth fabric. When I go to the corner, there is no material there to miter. It’s like I cut the border to short. Please help
Paula Salfate Lizaso
Perfect explanation! Came out just perfect
Melanie
Hi!
Regarding the length of the bands, you write, “Two of these pieces correspond to the length of my tablecloth and two go with the width.” And indeed, the picture ‘border 4’ shows your diagonal seam going right to the point of the corner, with no seam allowance. (BTW, it is very difficult to sew into that corner with no allowances and I’m really impressed that you were able to do this without having your machine chew up the fabric!).
But in the next 2 pictures, ‘border 5’ & ‘border 6’, suddenly THERE IS A SEAM ALLOWANCE at the end of the band, so either you can do magic or you went back and cut new bands, adding a seam allowance to the length of each. Besides being much easier to se, the addition of seam allowances adds a lot of stability these corners with 2 cut edges, and the result will hold up much longer against the repeated stresses of washing & pressing.
So I think you should change the text so that it matches the photos which show seam allowances. You could change your explanation of the band length to read:
“Two of these pieces equal the length of my tablecloth plus 1 inch for seam allowances and two pieces equal the width plus 1 inch for seam allowances”.
Then, after you explain how to mark the diagonal seam,
“Now make a mark with some chalk or a pencil. Draw a line from the point you marked to the bottom left corner.”
you could add:
[Now make a mark 1/2″ from the first mark (on the folded edge) and 1/2″ in from the corner on the unfolded edge. Using these marks as a guide, draw a second diagonal line exactly parallel to the first. This second line is the seam line.]
The half inch seam allowance on both ends of the band = the 1″ added when cutting, (1/2″ x 2 = 1″).
Even though your original instructions will work in theory, most folks won’t be able to sew those last few stitches into the corner without distorting the fabric. Either the stitches will gather up the fabric or the needle will push the last bit of the corner down into the sewing machine, below the stitch plate. Either way the corner will be a mess, the fabric will no longer be square, and it will be nearly impossible to match it to the corner of the table cloth without puckers.
Heini Helenius
Thousand thanks for this helpful tutorial !!
Heini Helenius
Thousand thanks for this helpful tutorial
isa
thank you so much for the clear explanation!!! I was looking for it so long!!!! =)
Kitty
to border an oval you’ll have to make a template, I’d say. I’d suggest that you make your oval, copy the edge on a piece of paper and trace inside the oval edge to make the inside edge of the border. sew the outside edges, flip to the right side and the fold under the inner edge, press and stitch.
it’s doable but if it’s to fiddly then know that I’ve successfully used a rectangle table cloth on my oval table and it works just fine.
Candy
This is very pretty. I just have one question though. I made something similar(not as pretty, of course) but I have a problem keeping it clean. Could anyone tell me what is the best way to wash it? My family has some messy eaters. I don’t know how to remove the oil stains when I put the table cloth to wash.
Any advice will be highly appreciated!
Candy
tsollen
I would start sewing the band half way on one side of the tablecloth so the seam is not so noticable. No mitered corners on an oval so it should be fairly easy. I would take a piece of 8 inch fabric and fold in half and iron, then attach the right side of the tc to the right side of the band and sew the whole way around. Then flip the band over to the right side and attach the other half of the band to the back side of the tc with a blind hem or maybe use a double needle decorative stitch.
AmyCat =^.^=
The easiest way to make matching napkins would be to make quarter-folded bias tape with your trim fabric (bias tape with the edges folded in twice). Google “making bias tape” to get several online tutorials, including at least one on YouTube…
Once you’ve got your bias tape, it’s easy to sew it onto the edges of your napkins, mitering the corners as you go…
Nola Culverson
How would you put the band on an oval table?
tsollen
I’m thinking about using the pillowcase rolled up method so that no seams show and mitering the corners. I’m going to have to have a 6 inch border to add the width. I have the linen but haven’t started the project.
Susana
If you really wanted to get fancy, you could make an even wider border than this one and do cutwork embroidery on the band, After cutting it out, the bottom main color would show through.
nicole novembrino
Oh my! you are right Paula! You do NOT have to subtract any measurements to account for the border. My mistake!!
Thanks for all the great feedback everyone!
Tess Chatham
I’d make two pieces of edging all around, one for the front and one for the back side… creating a mitered edge outside all edges of the tablecloth, rather than flipping it over from the back to the front. That way you could increase the width of the cloth by around 7″, which would suit my table better. I’ve used 60″ width cloths on it, but they look “stingy”. Adding a border like this would look so much better. And I like the idea of two colors, but even the same color would do it. I’d prefer #19 weight linen for my tablecloths. I’ve use it for that in the past and it worked up just beautifully and washed and wore well.
Laura Bullinger
If you made the trim as a separate band on both sides, then the tablecloth would be reversible. This method would work best for napkins, because they are visible on both sides during use.
Barbara
Wonderful! Thanks so much. Always more fresh ideas around here.
Leslie
Yay! You made it look so easy! I can’t wait to try it myself. Thank you!!!
Paula Rancourt
I may be confused, but I am not seeing how this border adds size to the cloth if it is flipped onto the right side and sewn down. That as well eliminates the need for a hem around the border. Did I misunderstand the directions??
rose muniz
I’m looking for the mexican bingo fabric. please help.