DIY Linen Duvet Cover
We receive bunches of emails all the time asking us how to sew duvet covers. The main problem seems to be trying to figure out a way to make a cover with linen that is 59 inches wide. Today, we are going to solve this problem! Making a duvet cover may appear like a daunting task at first, but you will soon see how easy it really is! Trust me, there are no fancy sewing tricks to making one of these and it won’t take you weeks (or even days) to finish.
The first step is to select the type of linen you want to use for your duvet cover. I’d go with IL019 linen. It’s a good medium-weight that will last you forever. It gets softer with every wash, and that’s really all I care about with my sheets. I need something soft that I will love sleeping in!
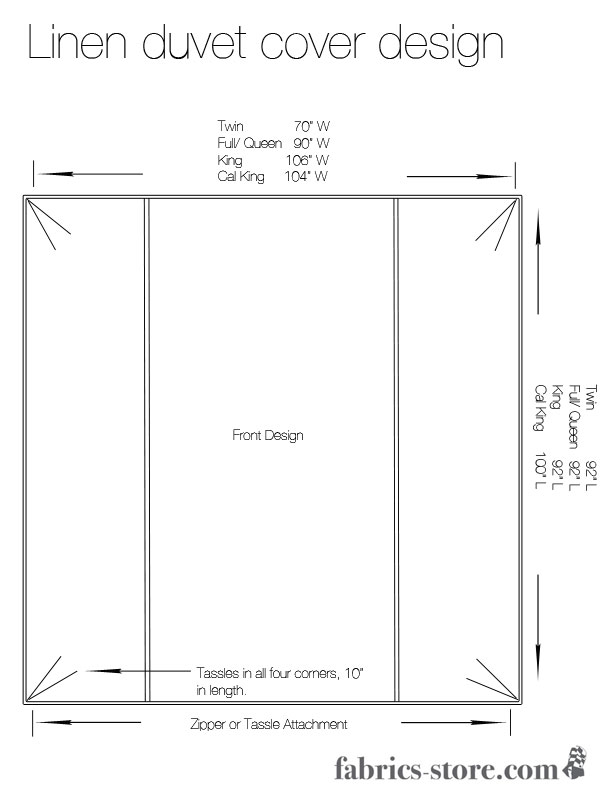
The measurements for all the different bed sizes are included in the pattern below. Remember- you must wash your linen before you start sewing. Wash in cold water and throw it in the dryer. I add fabric softener to make the linen feel extra nice. The softener is also a great way to eliminate lint on your linen. It won’t take very long but it is a crucial step. The fabric will shrink after you launder it, so you should purchase 10% more than you need. Nothing is more frustrating than starting a project, only to realize you don’t have enough fabric. I’ve been there….it’s no fun. Have enough linen beforehand and save yourself the trouble! You will need 12 yards of linen for a queen/king bed and 9 for a full-sized bed.
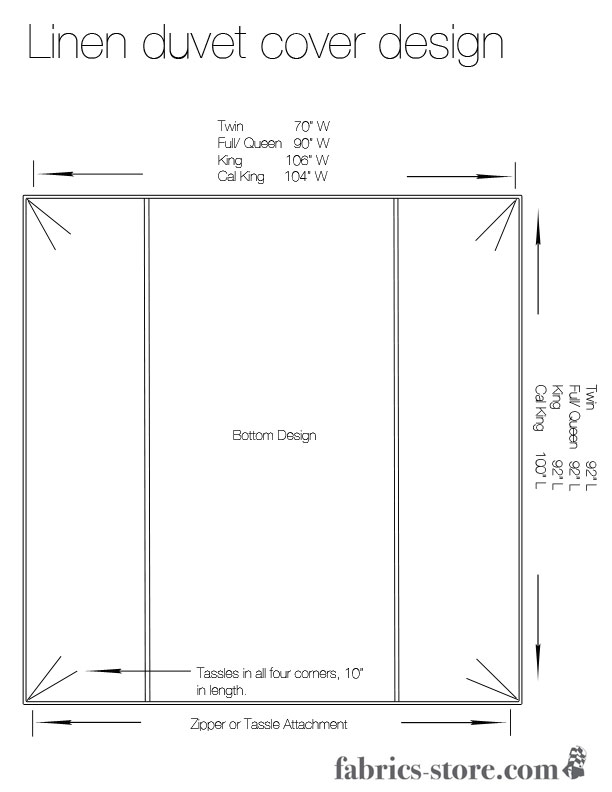
(CLICK ON THE IMAGES TO VIEW FULL SIZE WITH ALL MEASUREMENTS.)
Here is a helpful pattern if you are planning to make a duvet cover. The measurements for different bed sizes are included, so you can just follow the same basic pattern depending on what size duvet you want to make. The vertical lines that go down both sides indicates the seams that hold the separate pieces of linen together. This creates a classic line that runs down both sides of your duvet, while solving that "but my linen isn’t big enough!" problem. Those seams will answer all your duvet-making woes! I’ll show you how those seams look in the next few images.
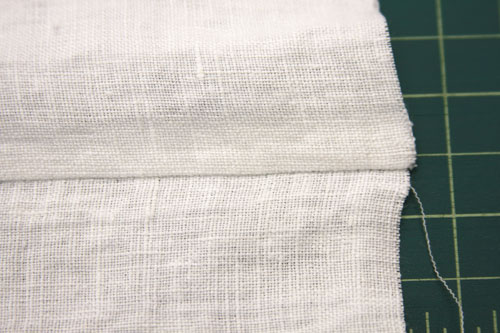
After you have measured and cut your linen so that you have enough for the duvet size you want, you can sew the pieces together. Keep in mind that you will essentially have three pieces of linen for the front and three pieces for the back. Begin by sewing the first three together with two straight seams. This will leave you with a larger piece of linen that will form one side of your duvet.
Repeat this same simple procedure to complete the other side of your duvet. These two large pieces should not be connected just yet. That step is coming up!
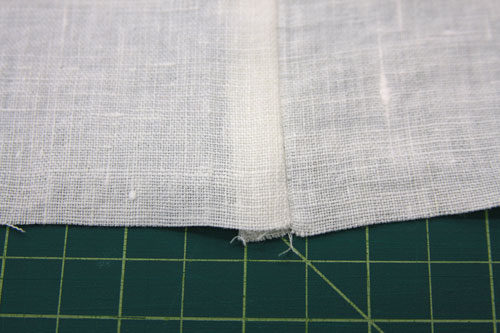
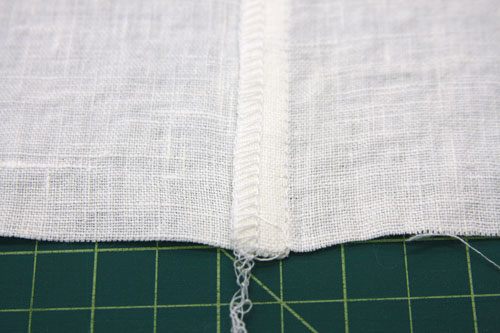
This is what the seams look like from the other side. When you sew the front and back pieces of the duvet together, these seams should all face inwards. I have an outerlock machine, so I finished the seams with that. It isn’t necessary to use the outerlock machine though if you do not own one. Everything will still come together to form a beautiful duvet cover.
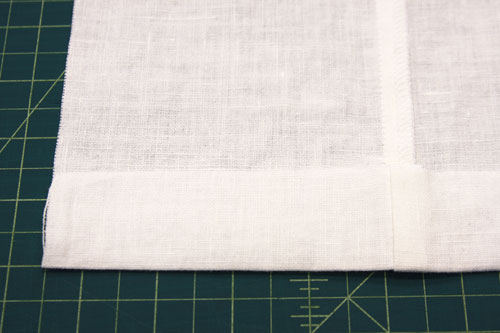
Fold the bottom (shorter) edge of each of your pieces 1.5 inches inwards to prep for the one inch hem.
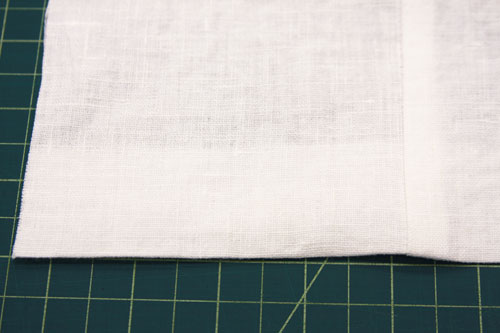
The fold should appear like this from the other side. We will not need to sew the hem just yet though. You will want to leave it like this until you are ready to insert a zipper, sew buttons, etc. Pick whatever type of closure you feel most comfortable with. I will show you one of my favorites in just a few steps.
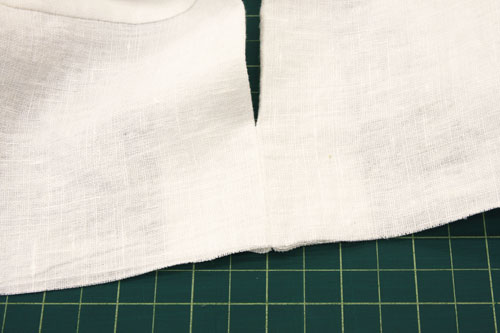
It is finally time to attach the two pieces of linen from the bottom. Just create a 2-3 inch seam at the outermost edges so the two pieces of linen are attached by the corners. This allows you room to attach a zipper or whatever type of closure you choose. I will show you a simple tie-closure that I picked out for my duvet cover in the next few steps.
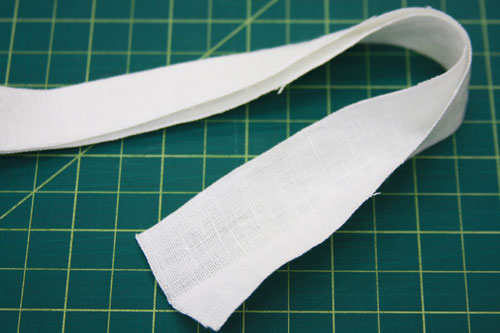
The ties will be placed about 6 inches apart along both sides of the duvet bottom. Once sewn, they a beautiful way to close your duvet. I actually prefer the look of the ties to hidden zipper. Each tie is 2 inches wide and needs to be at least 6 inches long. Cut as many as you need for your duvet size then fold them in half lengthwise.
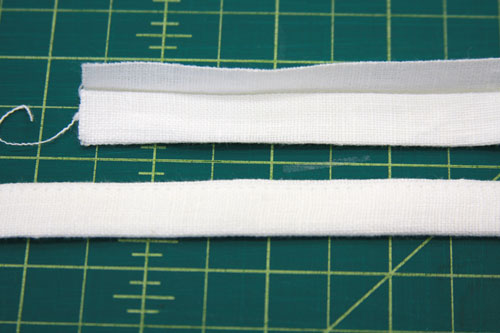
The top piece of linen shows you how to fold the edges into the middle crease you made with your first fold. Then you only need to make a seam along the edge to have your finished tie. The bottom piece of linen is what the tie looks like when it is all sewn. Repeat these steps for all the ties.
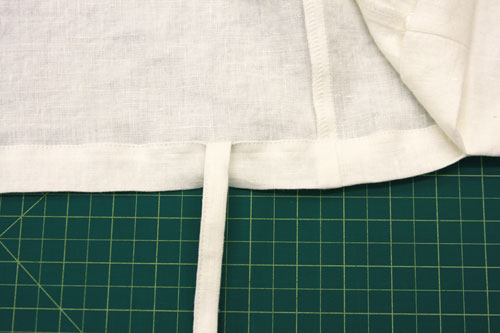
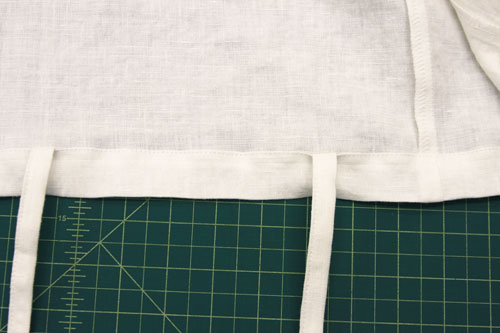
Insert each tie into the bottom fold of your duvet and sew along the hem to attach them. Start about 3 inches away from the bottom corner.
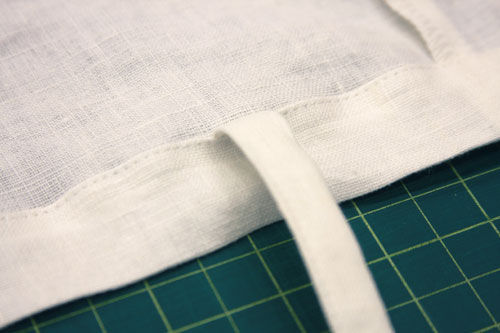
The picture above gives you a better idea of how the tie is attached while you sew the hem along the bottom.
Attach each tie while you sew the hem and place them about 6 inches apart.
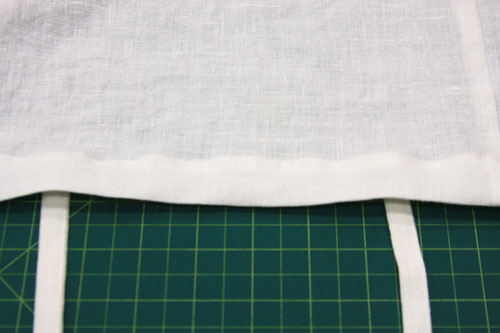
This is what the attached ties look like from the outside. Do this to both sides of the duvet bottom so you can tie them together.
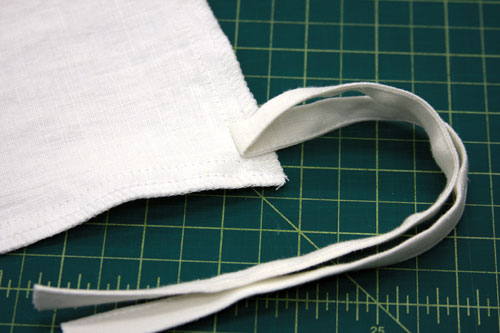
A nice little trick is to attach ties to the inside corners of the duvet cover to hold the duvet in place. Make a tie just like you did for the bottom closures but this time 12 inches in length. Fold it in half and sew it to the inside corner of your duvet cover. This step hardly takes any extra time but is really nice when you want your duvet to stay in place.
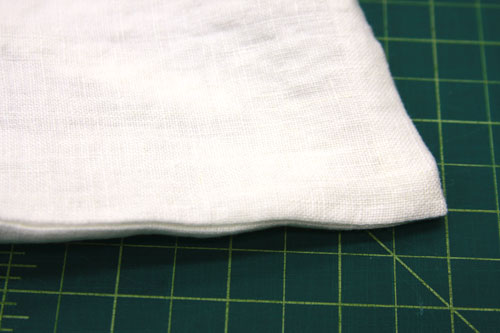
The last steps are super easy. Just seam up both edges and hem the top! The most satisfying part is the last step when you get to flip everything right-side out, push out those corners and gaze at that duvet cover you just made. It seemed like a feat but you did it!
If you’d like to sew a linen duvet cover like the one in this tutorial, then follow the link below to purchase middle weight, 100% linen IL019:
*Sewing a duvet cover wasn’t as hard as you thought, was it? How did you like our duvet cover instructions? I hope it answered all your questions concerning amounts of linen and measurements! If you have any more questions or suggestions, feel free to let us know! Comments are always welcomed here and on our Facebook page.









32 Comments
Pingback:
Elegant Quilt Cover Dimensions Gallery - Modern Quilt Pattern : Modern Quilt PatternPingback:
Best Quilt Cover Queen Size Measurements | Modern Quilt PatternFrances Nelson
Trying to wrap my mind around inserting a zipper. I imagine you sew the lower seam (v. long stitches), but how do you get the bulk of the duvet cover through the sewing machine? Also, do you leave the top seam till the last to complete. (Making a Cal. King size).
Thanks.
cynthia
I sew ribbon ties to the inside corners AND to the middle of each side (8 in all). I add loops in the same places to my duvet (why don’t they come with them?) So easy to get your comforter into the cover. Lay the cover inside out on the bed, place the duvet on top of it, tie the ribbons to the matching loop, turn it right side out. Voila! Comforter perfectly in place, and it will stay there.
Jessica
Brilliant idea! Why didn’t I think of that? Thank you!
celia
I made this and absolutely don’t know how I ever slept before. What I wished I had thought about was the fact to add a couple of inches to the sides so when you put in your down comforter you still have plenty of overhang. Love this!
Kathryn Blane
Thank you for including the “full” or ” double bed size. Most moderate priced duvet manufacturers use the same size for both full and Queen. I’ve made duvets in the past but your instructions are very straight forward and easier to follow than measuring and calculating for myself. One piece of advice I have is to check that your duvet cover drops on the sides and bottom to where you want or need. mattresses come in different thicknesses and this can impact the desired effect depending on whether or not your finished product covers the mattress sides.
Carol
I have always wanted to do this, but needed instructions. Thank you!
My question regards the finishing directions… “Just seam up both edges and hem the top.”
I have never had a duvet cover that was open at both ends. Is the top edge for this one hemmed the same way as the bottom edge, with ties also?
Thanks-
Barbara B
Oops!! I just found the tutorial for French Seams. Good to go!!
Thanks all,
Marybeth Wells
What is the best ‘fill’ to use inside of the duvet to maintain the healthy frequency of the cover?
tess miller
Of course you can use any fabric! There are many wonderful fabrics out there!
And to those wondering about yardage, you might consider a couple extra yards for pillow covers!
Retta
I wish I had your pattern last year. I made a duvet cover for my daughter, which turned out OK. With your pattern, the finished product would have looked much better. Thanks much for your patterns and tutorials.
Debbie Rak
Thanks for the pattern, which I have been thinking about for a year now, to put a cover on my husbands down comforter. Someone (our grandson who lives with us and is 3+1/2 years old left an orange popsicle melting on my husband’s comforter) and thank you all for the added help in measurements! I haven’t used my embroidery sewing machine in years now and am looking forward to getting some projects done including some sewing for myself and little Joey! Does this HAVE to be done in linen. I was hoping to used a nice brushed cotton! Any feedback here?
Tamara
To everyone in the site :). Please click on the two images that show the pattern of the duvet, when you do, you get a larger page which shows all the measurements for all the different sizes. Just one little click 🙂
Good luck
June
Darlene and others…
you have to attach some ties to your duvet if it doesn’t already have them.
Good Luck!
This is easier than it seams…pun intended..hehe
Wyn
I might have bought the material on the spot if only you could tell be yardage needed by duvet (bed) size.
I understand the basic instructions, but I still need to figure out the widths of each panel, add the seam allowance, and all that.
Or did I miss the part where the article told how many yards to order?
Wyncia
darlene
My question is how does the ‘corner’ tie hold the duvet in place? I have some pretty hefty ones… help me please. And by the way, excellent tutorial !!!!! Very clever and easy design and beautiful linen!!!! 😀
Alfreda Roberson
Excellent tutorial! I’ve found over the years that sometimes the instructions for something you do all the time may not always be clear to everyone. Alas, lucky us who “gets it!”
Sheila Swan Laufer
french seams are also elegant,inside and inside out so the whole thing is very finished and worthy of such cloth.
Krislyn Dillard
I thought I would note, if you don’t have an interlocking sewing machine, you can use a french seam (which are a lot easier then they appear).
Barbara B
I’m a simple seamstress and invent as I go along most times and not quite familiar with a French seam. Could you post a how-to or a photo of a finished item with a French seam.
Thanks,
nicole novembrino
Click on the pattern to see all the measurements! Sorry! I didn’t realize the size of the image cut off some of the measurements. Just click the image to view it and all the measurements will show up.
You need 12 yards of linen for a Queen or King size bed. For a Full size, 9 yards will do.
Pam
I know this post is older but am having faith that it might be answered. When you give the yardage “needed” are you saying the 10% addition is included in that measurement? Just don’t know if I need to order 12 yards or add 10% extra to the 12 yards. Thanks!
Claudia
Pam i have the same question. even though i think 12 yards have the 10% extra included. 12 yards it’s a lot of fabric.
Sheila Swan Laufer
Nikki says 5.4 yards and Dorothy says 12 — which is right?
Dorothy Waddell
After further calculations it seems that would be the same for the other bed sizes to provide the length needed. Most beds are one length. With the exception to the California Bed which is 6″ longer. (Must be alot of really tall people there).
Dorothy Waddell
For those who can not work out the yardage required. The King size will need 12yds. Total
If your working a pattern or contrast in the middle, then 6yds of each should do it. that includes seam allowance and fasterning.
Nikki MacCallum
I design and make organic duvet covers for a living. The sizes I use are twin – 66×86, queen – 88×90 and king – 104×90. For yardage you need (don’t forget to pre-shrink your fabrics!) twin – 5 yds, queen – 5.4 yds, king – 5.4 yds. Hope this helps!
Karen
Thank you for this tutorial! One thing I don’t see is the length for the different sizes. The width is there, but not the length. I’m assuming the grain should go with the length of the cover, and the length of the cover would be essential to figuring out yardage.
Patricia Malone
All beds are the same length unless you have a California King.
Frances Barret Reed
A very nice pattern BUT you only show, in your pattern, the duvet being 100″ long as you only mention the various widths but not the length – except in your diagram. Is the duvet supposed to be square with the same measurements on all sides? Or are they all supposed to be 100″ long?
Also – if you know what the final coverlet sizes are – why not tell us the yardage required for each (including the 10% overage?)
Monica
How many yards of linen should you purchase for a full/queen duvet?